Project 3 - Buzzer
After having played with the LED screen, I wanted to do something to try to use the pins on the Micro:bit. I’ve never really done anything with electronics so I started with a simple task – make a buzzer alarm!
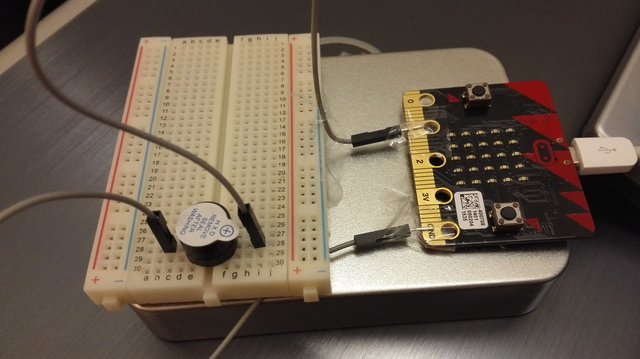
The CamJam EduKit (which I had just ordered for my Pi Zero) came with a breadboard, a buzzer and some jumper wires. Unfortunately I had no alligator clips or anything else that would have easily connected with the Micro:Bit, but there is always tape! (I’m not saying you should be connecting wires using tape. You probably shouldn’t.)
The buzzer I have is very simple – it will make a sound if there is current going through it. I placed the buzzer on the breadboard straddling the middle divide. The longer leg was connected via a jumper wire to pin1 .The other leg was connected to the ground (marked GND).Pin 1 will be an output pin, and when it is set on, the buzzer will sound.
I tested my contraption with this simple program just to see if it works, and it did! The pin1.write_digital(1) means the current is going out, and pin1.write_digital(0) means it is off. Pressing the buttons will turn the buzzer on and off.
I am amazed that it worked and that I did not electrocute myself in the process!