Ok thanks bye
Playing with a Micro:Bit has been so much fun, I've learned lots of new things and thoroughly enjoyed the time I've spent with Marja and Mei-Xiu. But it is time to send Marja on to a new host, Peter Cunderlik, who I am sure will come up with lots of interesting things. Thanks for reading my ramblings! You're awesome!
Project 5 - Theft Alarm
I started working on this script after I successfully connected Mei-Xiu to a buzzer, but gave up when Mei-Xiu broke. Now I went back to it, the idea is to be able to set an alarm that will go off if the device is moved.
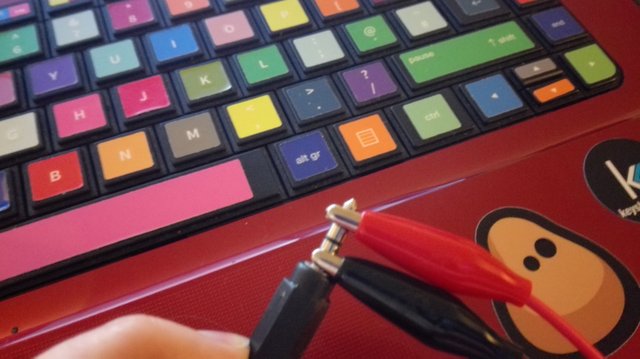
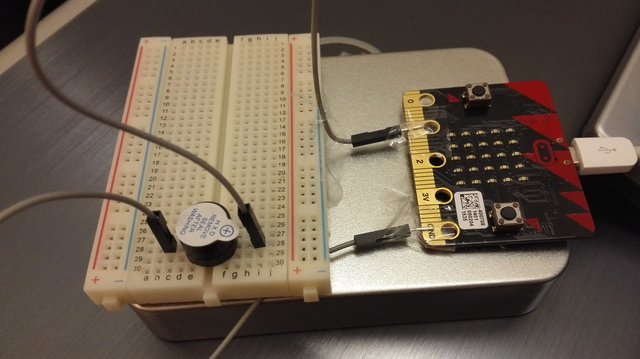
As I now had some crocodile clips I connected the CamJam EduKit buzzer directly to the microbit without the need for a breadboard. I found it easiest to use the pins closer to the Micro:Bit edges, so I connected the longer leg of the buzzer to pin0 (red wire) and the short leg to GND (black wire).
In the script I needed to make sure the device slept briefly before I measured the starting coordinates for the accelerometer when setting the alarm as it is quite hard to keep the device still when clicking a button. After setting the start coordinates, the alarm will be raised if the coordinates change more than a tiny bit. Once the alarm has gone off, it can be turned off by clicking button B (please don't tell that to the thieves).
Here is a video of the alarm in action, shot with some help from the self titled "best hand actor in the world".
Source code can be found here.
Project 4 - Music Player
I acquired some crocodile clips and decided to try out the music module with the microbit. The documentation explains pretty well how to use the module - you can play music by making a list of notes to play. There are also some ready tunes available for you to use.
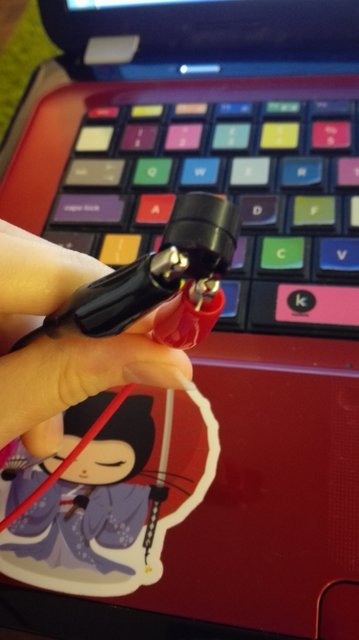
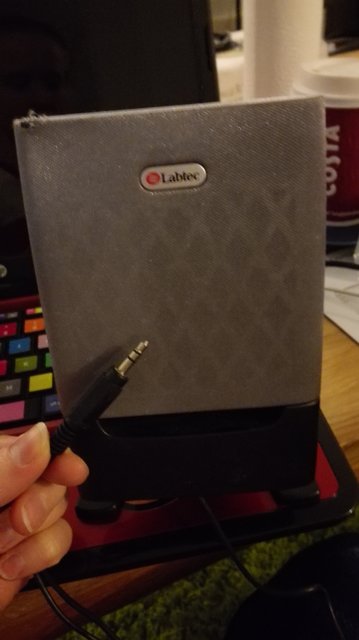
Before I could test the music I needed to connect Marja into speakers. I had some old passive speakers (unpowered) that I used, but I tested with my headphones as well and they worked too (but the sound was way too loud to wear the headphones). Here is a picture of the speaker I used:
I also used 2 crocodile clip wires. The black one was connected to the Ground pin on the Microbit, and then to the bottom of the audio jack. The red one was connected to pin0 on the Microbit and then either to the top of the jack (to play music from left speaker) or the middle of the jack (to play from the right speaker).
The music module uses the pin0 by default, but you could change it to another pin too if you wanted to. I had some trouble with the music module at first as I did not realise it had to be imported separately, I'd been used to having everything I needed by starting the code with from microbit import *. With the music module I also needed to import music.
Playing music is "blocking" by default, which means you will have to wait until the tune finishes before you can do anything else. I turned this off using the wait=False parameter so that I was able to change songs in the middle of the tune if I wanted to.
I wanted to change the tune by shaking the device. I used the code Martin O'Hanlon came up with for his Magic 8-ball to detect if the device had been shaken, and it worked really well.
Source code can be found here.
Meet Marja
I just received a new Micro:Bit to replace Mei-Xiu.
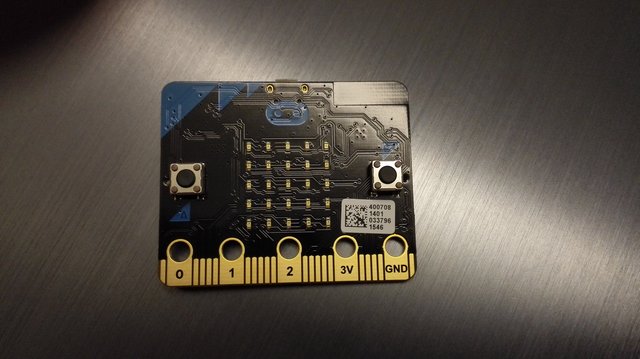
As she has beautiful blue colouring like a blueberry, I decided to name her Marja which means a berry in Finnish. I'll do my best not to break this one!
Before starting anything more exciting, I decided to try out the new python editor / repl client Mu.
As per the readme I downloaded the latest build for Linux - the file was called mu-2016-01-13_15_15_57. This is how to run the program:
chmod +x mu-2016-01-13_15_15_57
sudo ./mu-2016-01-13_15_15_57
If I didn't use sudo I was still able to run the program, but the REPL part and most of the buttons (like quit) would not work.
I like Mu as you can flash the device directly without the need to manually drag the files or use a script like upyflashed to automate that part. I also like having the option of saving files as .py so that the code is readable after - the hex files aren't great to look at.
I don't like the excessive confirmations that pop out every time you do something, but as this is a new program it is bound to get better. Definitely a great start!
Tomorrow I can hopefully get Marja to do some more interesting stuff.
RIP Mei-Xiu
I was working on a project to get Mei-Xiu to raise an alarm if it is moved (a very useful feature, I'm sure). I flashed a script to it and it started its usual rolling an error message on the screen when suddenly the LEDs got really dim and went out. Mei-Xiu turned itself off and since then it refuses to turn on. Oh well, it sure was fun while it lasted!
P.S. No, I did not have wires taped to it when this happened. I would have added those once the script was working otherwise :D
Project 3 - Buzzer
After having played with the LED screen, I wanted to do something to try to use the pins on the Micro:bit. I’ve never really done anything with electronics so I started with a simple task – make a buzzer alarm!
The CamJam EduKit (which I had just ordered for my Pi Zero) came with a breadboard, a buzzer and some jumper wires. Unfortunately I had no alligator clips or anything else that would have easily connected with the Micro:Bit, but there is always tape! (I’m not saying you should be connecting wires using tape. You probably shouldn’t.)
The buzzer I have is very simple – it will make a sound if there is current going through it. I placed the buzzer on the breadboard straddling the middle divide. The longer leg was connected via a jumper wire to pin1 .The other leg was connected to the ground (marked GND).Pin 1 will be an output pin, and when it is set on, the buzzer will sound.
I tested my contraption with this simple program just to see if it works, and it did! The pin1.write_digital(1) means the current is going out, and pin1.write_digital(0) means it is off. Pressing the buttons will turn the buzzer on and off.
I am amazed that it worked and that I did not electrocute myself in the process!
Project 2 - Bouncy Ball
In my next project I wanted to get a ball to bounce on the display. I was hoping maybe to build a game out of it later, but first I needed to get a ball to move and bounce.
I started by giving the ball x and y coordinates and then a speed for both the x and y. On each round the ball's coordinates would change based on the speed. If the ball hit an edge, the speed is multiplied by -1 to change the direction of the ball.
If the speed was more than 1 the ball quickly ended outside of the grid (and caused an error). My not entirely real world like fix was to check if the ball would be outside of the grid before drawing it, and if it would, force within the grid by settingt it to the max or min width/height (depending on where it was).
While working on this I noticed two gotchas: I had to remember to clear the previous pixel out before drawing the new one, and I had to add a sleep timer between moves or the ball would appear to be moving way too fast.
As the 5x5 grid is tiny it turns out the ball gets stuck in a rut quite easily. To counter this I added options to change the x and y coordinates using the buttons so that the ball could be moved to a new trajectory.
I also added a function to add a new ball to the mix by clicking both buttons. It turned out the more balls I added the slower it all got. I did my best to counter this by reducing the sleep time for each new ball added to the mix. I also made the maximum number of balls to be 4 -- after that trying to add more ends the program.
You can find the source code here. Unfortunately I didn't get a video of this as poor Mei-Xiu broke down before I remembered to video this one, but just imagine an awesome little ball bouncing around like crazy. (Or just run the code and see what happens.)
Edit
Now that Marja is here, I was able to get a video of this program.
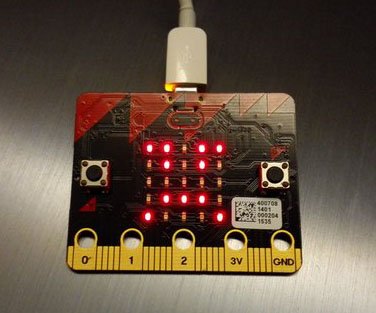
Project 1 - Awesome hearts
As I mentioned the first thing I wanted to do was something nice for the next person that will host Mei-Xiu. What could be nicer than a beating heart? With trial and error I found the HEART and HEART_SMALL image resources (I was still having trouble with the REPL at the time and hadn't found the documentation yet), but I couldn't figure out if I could animate swapping between them using a ready function. So I just animated them myself to make the heart beat.
I wanted to do something with the buttons as well, so I added an silly message to be displayed when each button is clicked. Clicking both buttons at the same time gets you out of the program!
Here is a short demonstration video, and the code can be found here.
First Impressions and Environment Set Up
I first received Mei-Xiu yesterday. I plugged it into my computer and thanks to Eleni's project was instantly rewarded with a sad face. This gave me an idea to make some more positive program to flash on the device before I send it on!
But first I needed to set up the coding environment. I managed to get upyed working following the instructions, but getting the REPL client microrepl to work was not that easy. When I tried to install and run it, I kept receiving import errors ImportError: No module named console. After a looong time I finally figured out that I had the wrong version of pyserial installed.
Installing microrepl on Ubuntu 14.04
I already had python and pyserial installed, so first I needed to uninstall the incorrect pyserial version.
sudo pip uninstall pyserial
Then I installed the correct version:
sudo pip install pyserial==2.7
and finally I was able to install Microrepl.
sudo pip install microrepl
I also noticed I had to run microrepl using sudo or I would get errors that I had no access to the port the MicroBit is using.
sudo urepl
After that everything was working really well!
P.S. If you'd rather read this in Finnish, you can find it here.